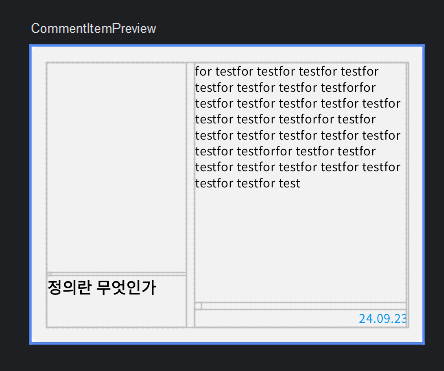
📌 필요했던 레이아웃

대략 이런 형태의 컴포넌트가 필요했는데, 이게 자식 컴포넌트 measuring과 실제 배치의 순서 때문에 만들기가 까다로웠다. 처음 시도한 것은 왼쪽의 책 컴포넌트와 오른쪽의 코멘트 및 작성 날짜가 담긴 Column을 한 Row에 배치하는 형태였는데, 이게 어디하나 사이즈를 고정해놓은 것이 아니라서 쉽지 않았다.
Row의 height이 책 컴포넌트의 height을 wrap 하는 크기로 고정되고 우측의 column은 그 크기까지만 펼쳐지길 바랐는데, column에 fillMaxHeight()을 쓰면 바로 최대 높이로 커져버리고, 내부의 내용 Text에만 weight를 1f로 주는 방법도 사용해보았지만 결과는 같았다.
저 날짜는 제일 아래 쪽에 위치해야 하고, 내용은 위에서부터 날짜를 침범하지 않는 선에서 꽉차길 원했는데 그 부분 때문에 난감했던 것 같다.
❌ Layout 이용해서 작성해보기
@Composable
fun CommentItem(
    book: Book,
    modifier: Modifier = Modifier
) {
    Surface(
        modifier = modifier
            .clip(RoundedCornerShape(10.dp)),
        color = theme_grey_whiteSmoke
    ) {
        Layout(
            content = {
                BookItem(
                    book = book
                )
                Column {
                    Text(
                        text = "for testfor testfor testfor testfor testfor testfor testfor testforfor testfor testfor testfor testfor testfor testfor testfor testforfor testfor testfor testfor testfor testfor testfor testfor testforfor testfor testfor testfor testfor testfor testfor testfor testfor testfor test",
                        style = Typography.labelMedium,
                        overflow = TextOverflow.Ellipsis,
                        modifier = Modifier
                            .weight(1f),
                    )
                    Spacer(
                        modifier = Modifier.size(8.dp)
                    )
                    Text(
                        text = "24.09.23",
                        style = Typography.labelMedium,
                        color = theme_color_lightDodgerBlue,
                        textAlign = TextAlign.Right,
                        modifier = Modifier
                            .fillMaxWidth()
                    )
                }
            },
            modifier = Modifier
                .padding(DEFAULT_PADDING)
        ) { measurables , constraints ->
            val bookItem = measurables[0]
            val bookItemPlaceable = bookItem.measure(constraints)

            val maxHeight = bookItemPlaceable.height

            val column = measurables[1]
            val columnPlaceable = column.measure(
                constraints.copy(
                    maxHeight = maxHeight,
                    maxWidth = constraints.maxWidth - bookItemPlaceable.width - 8.dp.roundToPx()
                )
            )

            layout(constraints.maxWidth, maxHeight) {
                bookItemPlaceable.place(0, 0)
                columnPlaceable.place(bookItemPlaceable.width + 8.dp.roundToPx(), 0)
            }
        }
    }
}
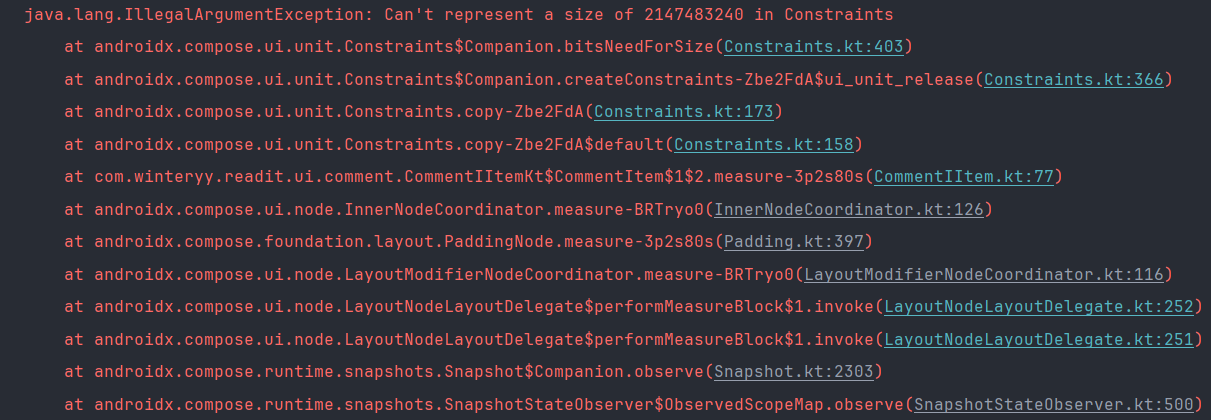
그래서 처음에 사용한 것은 Layout을 커스텀하는 것이었다. MeasurePolicy를 직접 구현해줄 수 있기 때문에 코드 정리가 덜 되어 조금 러프한 상태지만, 위의 이미지 처럼 어렵지 않게 만들어 낼 수 있었다. 하지만 이 방법에는 치명적인 문제가 발생했는데, 저 컴포넌트를 LazyRow의 컴포넌트로 사용하려고 하다보니 constraints의 maxWidth가 너무 커져서 에러가 생겼다.

⭕ Compose ConstraintLayout 도입하기
그 다음 도입한건 ConstraintLayout이었다. Compose에서도 ConstraintLayout을 지원하기 때문에, 복잡한 레이아웃을 작성하기 위해서는 도입할 수 있다. 기본적으로 지원하는건 아니고, 의존성을 따로 추가해주어야 한다.
androidx-constraintlayout-compose = { module = "androidx.constraintlayout:constraintlayout-compose", version.ref = "constraintlayoutCompose" }
버전은 공식 문서에서 stable한 버전으로 넣어주었다.
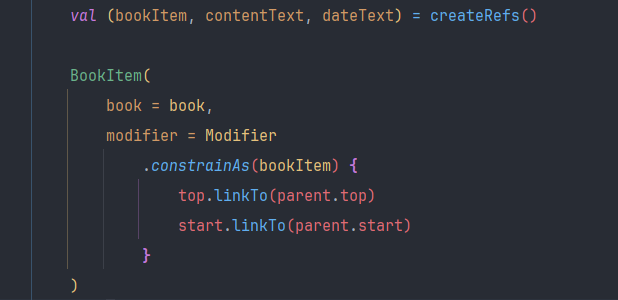
사용법은 간단한데, createRef()나 createRefs()로 레퍼런싱 할 수 있는 레퍼런스들을 생성하고, 해당 레퍼런스로 지정할 Composable의 modifier.constrainAs()의 ref 인자로 넣어준다. 그리고 해당 메소드의 constrainBlock 인자에 필요한 제약 조건을 구현해주면 된다.
글로 써놔서 조금 복잡해 보이지만, 공식 문서를 참조하거나 실제 작성된 코드를 보면 그리 복잡하지 않다.

xml로 열심히 안드로이드 UI를 작성해보았다면, 눈치껏 바로바로 써먹을 수 있는 수준이었다. 대신 예상과는 조금 다르게 동작하는 부분이 있다면, 컴포넌트의 크기가 알아서 제약 조건 사이를 가득 채우지 않는다는 것이다.
예를 들면, xml로 작성하던 ConstraintLayout에서는 가로를 0dp로 주고 좌우의 constraint를 지정하면 그 제약에 맞춰 가로가 꽉 찼었지만, Compose의 ConstaintLayout에서는 그러지 않았다.
🔨 컴포넌트의 크기가 제약 조건을 초과하는 문제

분명 제약을 똑바로 걸었음에도, 컴포넌트의 크기가 초과되는 문제로 꽤 헤맸다.

알고보니, 저렇게 가로와 세로에 Dimension을 지정해줄 수 있었고, xml에서와 같은 동작을 기대하려면 Dimension.fillToConstraints를 지정해주어야 했다.

물론 그 외에도, 용도에 따라 다양하게 쓸 수 있는 다양한 값이나 메소드를 지원하고 있으니 적재적소에 사용하면 될 것 같다. 이 내용이 공식 문서에는 바로 나와있지 않아서 정말 한참 찾아다닌 것 같다. 이젠 알게 되었으니 다음엔 바로바로 해결할 수 있겠지..
참고자료
ConstraintLayout in Compose | Jetpack Compose | Android Developers
Compose의 ConstraintLayout | Jetpack Compose | Android Developers
이 페이지는 Cloud Translation API를 통해 번역되었습니다. Compose의 ConstraintLayout 컬렉션을 사용해 정리하기 내 환경설정을 기준으로 콘텐츠를 저장하고 분류하세요. ConstraintLayout은 화면에 다른 컴포
developer.android.com


